(1)
Marina Spine Center, Marina del Rey, CA, USA
Microscopic lumbar discectomy is an ideal way to remove a disc fragment. Indications include the following:
1.
Morbidity of sufficient severity and duration to warrant operative intervention.
2.
Presence of radicular leg pain, intensity of leg pain greater than 50 % over back pain, with the pain distribution preferably over the course of a radicular nerve.
3.
Neurologic deficit and motor sensory reflex loss, enabling the surgeon to establish which nerve is involved.
4.
Studies should indicate an anatomical lesion that corresponds to the patient’s symptoms. That anatomical lesion should be in a location that corresponds to the symptoms and is usually a herniated disc, extruded disc fragment, sequestered disc fragment, or a segmental localized lateral recess stenosis.
Our decompressive technique uses microscopic operative techniques to achieve three aims:
1.
Remove the obstruction from the canal and the disc fragment from the nerve.
2.
Visualize the nerve and blood vessels to provide better protection for both.
3.
Cause as little injury as possible to normal structures through better visualization, better lighting, and better exposure.
We are confident that removal of a source of persistent radiculopathy, such as an extruded disc fragment, in conjunction with an excellent postoperative rehabilitation program, offers the potential to return the patient to full activity.
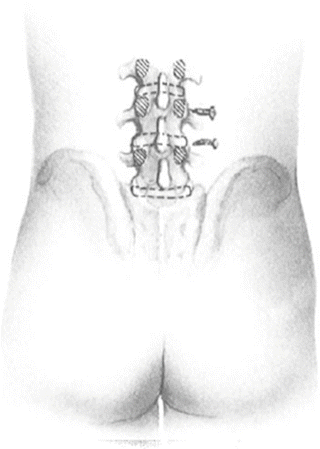
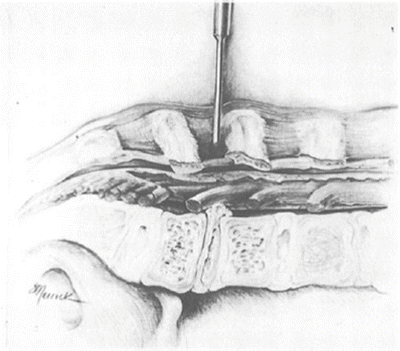
With the patient’s studies on the X-ray view box in the operating room, after induction of general anesthesia, the patient is placed on the Andrews frame. The skin is prepped, and two or three needles are inserted in a paraspinous position. A lateral X-ray is taken (Fig. 48.1). Using the needles and the position of the disc as a guide, the skin incision is placed over the disc space. Usually, this is from the midportion of the disc space, approximately 2 cm caudally. After the X-ray is taken, the needles are removed and lines are drawn on the skin perpendicular to the spine with a marking pen to indicate the location of the pins. Full prepping and draping is carried out. The skin incision is made using the marking pen lines to put the incision over the disc space. Then a Cobb elevator approximately the width of the skin incision is placed into the wound, and dissection is carried gently through the subcutaneous fat to the fascia at the spinous process. The Cobb stretches the lumbodorsal fascia over the edge of the spinous process, and the fascial incision is made on the lateral edge of the bulbous tip of the spinous process. Holding the fascia with the Cobb with one hand, use the Bovie or knife to incise the fascia. Make a generous fascial incision and place the Cobb elevator into the wound onto the undersurface of the spinous process. With the curve of the blade facing medially, using gentle dissection, sweep out laterally. A lateral-facing Cobb may be inserted to pull laterally. Palpation of the cephalad and caudal lamina allows the gentle sweeping of the muscles off the interlaminar area. Holding the muscle back, place the Williams blade-point retractor. The spike is placed in the interspinous space and the blade length touches the facet capsule. Open the retractor, exposing the interlaminar area. With the retractor in place, place the Kocher in the interlaminar area (Fig. 48.2). There is no vigorous exposure of the area. Palpation alone allows determining the cephalad lamina and the caudal lamina. Then, obtain a final X ray that indicates the appropriate interlaminar area. Remember that the interlaminar area is caudal to the disc space that is to be exposed. The Kocher should be caudal to the skin marks used to indicate the disc space and caudal to the disc space on the X-ray. After return of the interlaminar marking X-ray, the microscope is brought in and the Kocher removed under direct vision. The microscope is used from the time the second X-ray is taken. We use a large pituitary to gently remove any soft tissue over the interlaminar area. The superficial ligamentum flavum is exposed.


Fig. 48.1
Place two needles lateral to the spine at the approximate level of the disc space. The spinous process is not used as the marker because its relationship to the disc space varies. For an operation on the disc, the skin incision is best placed directly over the disc from the center of the disc for 2 cm caudal

Fig. 48.2
Three-dimensional thinking is important. You must understand the relationship of the spinous process, the lamina, the interlaminar area, the facet joints, and the transverse processes to the disc space. The interlaminar area leads to the disc space. The second X-ray is taken with the Kocher in the interlaminar area
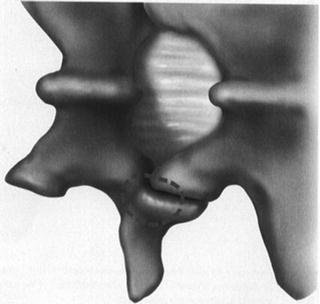
Incise the superficial ligamentum flavum laterally and dissect it medially or cut it free from the caudal lamina and dissect caudal to cephalad. The deep ligamentum flavum is exposed (Fig. 48.3). We handle the deep ligamentum flavum in one of three ways. One method is to make a longitudinal incision in the lateral third of the ligamentum flavum. Then, protecting the nerve with the Penfield 4, resect the lateral third of the ligamentum flavum with the Kerrison. A more common method is to use a small cutting acorn bur and do a laminotomy of the cephalad lamina to the insertion of the ligamentum flavum. The laminotomy can be small and in the cephalad lateral corner to expose the lateral ligamentum flavum. Use a curette to detach the cephalad insertion of the ligamentum flavum. Use a nerve hook to free up the ligamentum flavum and to dissect it cephalad to caudal. The nerve hook can hold the ligamentum flavum up and allow removal with the Kerrison to begin.


Fig. 48.3
The exposed right-side interlaminar area with the view of the pedicle superimposed. The superficial layer of the ligamentum flavum can be removed by gently cutting the attachment of the superficial ligament to the facet joint capsule and dissecting this medially with the curette. This maneuver exposes the yellow longitudinal fibers of the deep ligamentum flavum. The dashed line indicates the pedicle
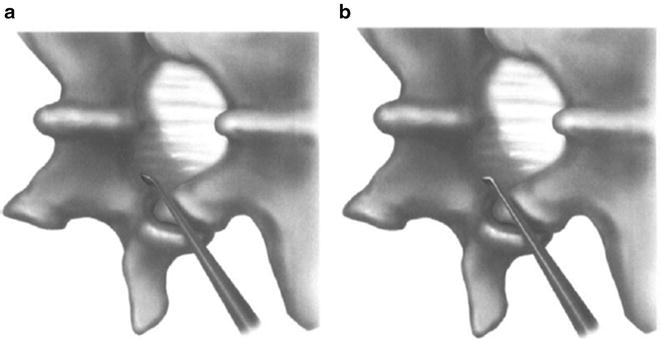
The method we prefer is to use a curette to detach the caudal attachments of the deep ligamentum flavum from the leading edge of the caudal lamina and from the lateral wall of the facet (Fig. 48.4). With the Kerrison, do a small laminotomy to open the epidural space (Fig. 48.5). The ligamentum flavum is removed with the Kerrison caudal to cephalad. The ligament, being elastic, shrinks up, helping the dissection. Detach it laterally and dissect it cephalad (Fig. 48.6). To ensure lateral exposure, first the inferior and then the superior facet may need to be trimmed with a Kerrison (Fig. 48.7). Gentle palpation with the dental identifies the pedicle. You should have a distinct understanding of the intracanal structures. The pedicle is the key to intracanal anatomy (Fig. 48.8). When the pedicle is identified, you know that the disc space is less than 1 cm cephalad. The traversing nerve root is immediately medial and the exiting foramen is caudal to the pedicle. The foramen below is caudal to the pedicle; the foramen above is cephalad to the pedicle. The exiting nerve root of that segment is cephalad to the disc space and the pedicle. The traversing nerve root of one segment becomes the exiting root of the level below. For example, the 5th nerve root is the traversing root of the L4–L5 neuromotion segment (or level) and the exiting nerve root of the L5–S1 segment. The exiting nerve root of the L4–L5 segment is the 4th nerve root.


