Fig. 33.1
Picture of the AMSCO table where the top of the table is rotated 180°. In this configuration, the C-arm will be able to rotate freely without contacting the base
STEP ONE: Place patient in lateral position (Fig. 33.2). Place axillary roll, pad down leg and between legs, and flex both hips to relax psoas muscle (both hips flexed prevents pelvis from falling anterior), bend knees to prevent leg falling. Pad under down leg, especially peroneal nerve at fibular head. Position patient so that break in table is at top of iliac crest (Fig. 33.3).
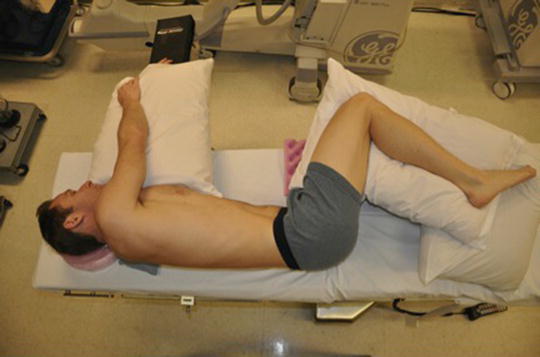
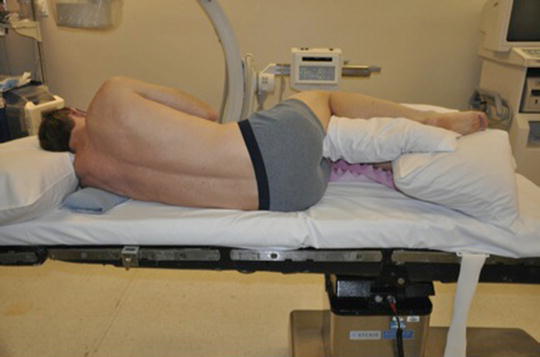

Fig. 33.2
Top view of patient on the bed. Have the patient as posterior as possible but do not have the patient overlying any radio-dense bars or side rails of the bed; this is often 4 in from the edge

Fig. 33.3
Posterior view of patient on the bed. Ensure that the cephalad border of the iliac crest is in line with the axis of rotation of the hinge of the bed
Use hip grips to stabilize patient (Fig. 33.4): one posterior at chest and one anterior at chest. Position patient 4 in from posterior edge of table. This allows subtle adjustment in tilting bed to correct rotation. If the bed is tilted too much posterior, then the metal bar on the side of the table can block the X-ray view. If the bed is tilted too much anterior, then the surgeon will be bent over too far to do the surgery.
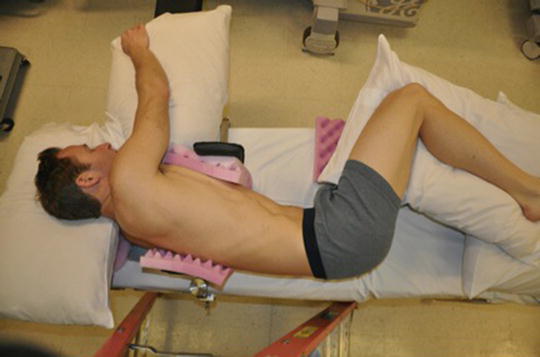

Fig. 33.4
The hip grips are placed anteriorly and posteriorly in the thoracic region to help control rotation of the patient. The “down” leg as well as the “up” leg are flexed symmetrically also to help stabilize rotation
Know your table. You want to position the patient posterior enough on table so you don’t have to lean over, but if you need to tilt the bed to correct rotation on AP view, does the table have radiodense bars that will obstruct your X-ray?
STEP TWO: Check AP X-ray for rotation. Correct rotation now, before final taping and breaking of bed. Once patient is taped to the bed, you can make subtle adjustments by tilting the bed, but you don’t want to tilt the bed too much and encounter the problems described above. If operating on multiple scoliotic levels, tape the patient to the bed with the middle operative disc in neutral on the AP X-ray. Make subtle tilts in the bed to neutralize the other discs when specifically working on them.
STEP THREE: Tape the patient to the bed. Secure patient to the bed with 6-in elastic tape (Tensoplast/Elastoplast) (Fig. 33.5). Use one complete roll circumferentially around the bed and patient for the iliac crest and one for the rib cage. Don’t worry if the tape interferes with the surgical site, it can be rolled back off the skin.
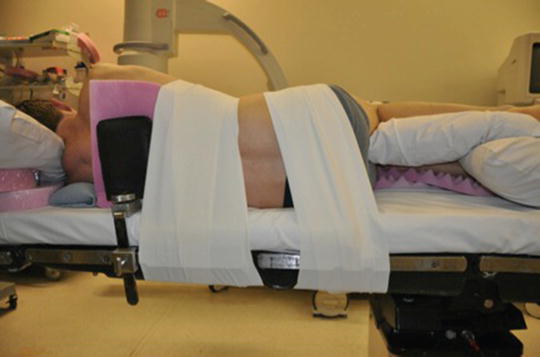

Fig. 33.5
Patient is secured with elastic tape (Tensoplast) circumferentially about the thorax and iliac crest. The tape can be rolled back to expose surgical site if needed
Tape the legs across thigh and across lower leg to hold hips and knees flexed with silk tape.
STEP FOUR: Break the bed (Fig. 33.6). Generally, break the bed 50 % of the maximum allowed. Breaking the bed too much puts tension on the psoas and lumbar plexus, and closes down the contralateral side of the disc. Breaking the bed too little doesn’t move the ribs and iliac crest apart to open the surgical site. At L4–L5, break the bed enough to get the iliac crest out of the way. Generally, if the iliac crest crosses the L4–L5 disc, by taping the crest to the bed and breaking the bed, access to the disc should be possible. If the crest crosses the middle of the L4 vertebral body, then access is still possible but probably will be difficult. A bump may be placed to help position the iliac crest out of the path of the retractor and deliver the L4–L5 disc space (Fig. 33.7). As well, part of the iliac crest may be removed (and used for bone graft) if it is blocking access to the L4–L5 disc.
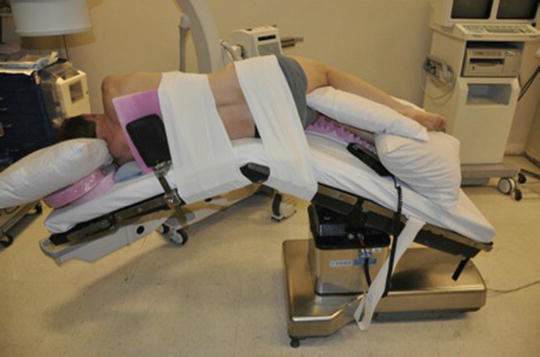
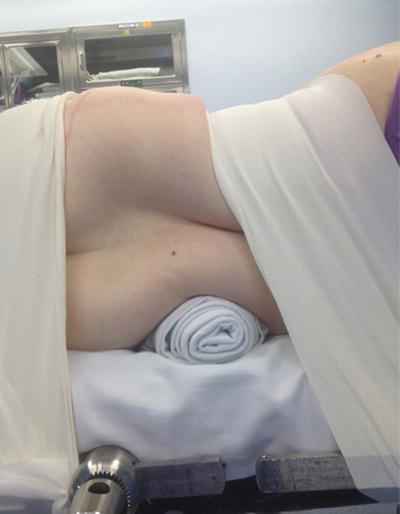

Fig. 33.6
Breaking the bed opens up the disc space on the “up” side. This allows for easier access for the discectomy. The elastic tape will keep the iliac crest/pelvis secured to the table

Fig. 33.7
A small bump may be placed just proximal to the iliac crest to aid in delivering the L4–L5 interspace. This also helps to keep the iliac crest caudally
STEP FIVE (Fig. 33.8): After breaking the bed re–secure the legs so that hips and knees flexed (gravity may cause them to drop down).
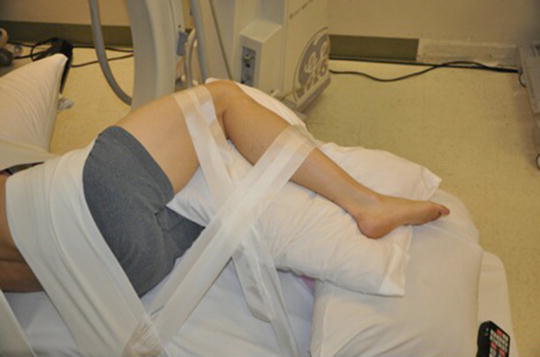

Fig. 33.8
Secure the legs with tape after breaking the bed to maintain a hip and knee flexed posture. A crisscross pattern is utilized. Do not compress over the peroneal nerve at fibular head
STEP SIX: Check AP X-ray for rotation (Fig. 33.9)—tilt bed for subtle corrections.
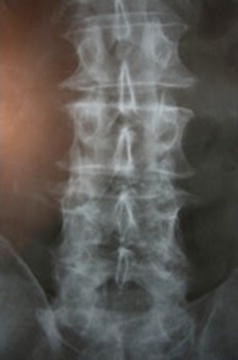

Fig. 33.9
AP X-ray. For a true AP X-ray of the index level, have spinous process equidistant from pedicles and have perfect and symmetric shaped circles for the pedicles. May need to adjust wig-wag of the C-arm to visualize the base of the pedicles
STEP SEVEN: Check lateral X-ray (Fig. 33.10). (1) Adjust trendelenburg in order to make operative disc perpendicular to floor and parallel to X-ray beam in neutral position. (2) Mark line on skin parallel to disc space (place several centimeters superior or inferior to disc so that it does not interfere with mark for skin incision). Line shows angle of disc based on lordosis/kyphosis. When the X-ray tech moves imager to AP view, the wig wag should be adjusted to make the X-ray beam parallel to this line. This provides the best Ferguson view and makes the endplates most clear on the AP view. This is the only adjustment the X-ray tech makes: everything should be 0–90°, except in the AP view make the X-ray beam in line with the angle of the disc.
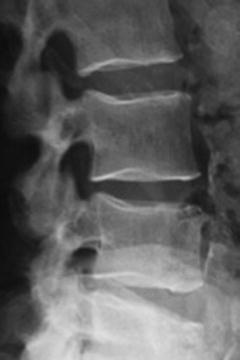

Fig. 33.10
Lateral X-ray. Have the index level perpendicular to the floor. For a true lateral X-ray, the edges of the end plates will be en fosse and there will be no obliquity. The pedicles will be superimposed appearing as one singular pedicle
Summary
1.
Lateral Position—Top of Iliac Crest at Break in Bed
2.
Check AP X-ray—Adjust Rotation
3.
Tape the Patient—Elastic Tape
4.
Break the Bed
5.
After Breaking, Re-secure Flexion of Hips
6.
Check AP X-ray—Correct Rotation
7.
Check Lateral X-ray
(a)
Adjust Trendelenburg—Make Disc Perpendicular to Floor
(b)
Mark Line on Skin Parallel to Disc for Wig Wag Adjustment for AP X-ray
Incision
1.
Use tip of stylet from intubation to locate point on skin that overlies just anterior to middle of disc on lateral X-ray (Fig. 33.11).
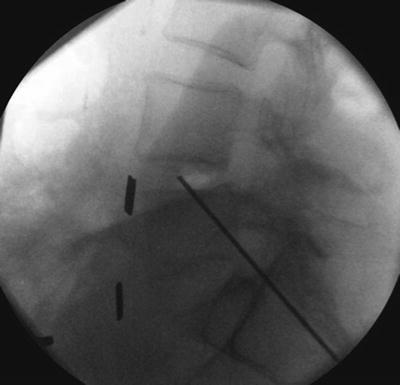

Fig. 33.11
Lateral X-ray identifying that the tip of the radio-dense marker is just anterior to the midpoint of the disc space
Mark point on skin with marker. Draw vertical line on skin, superior and inferior to this point (this serves as guide to direct surgery directly down to the disc). Draw second line for skin incision, obliquely in line with iliac crest and ribs, equidistant anterior and posterior from the center point (Fig. 33.12).
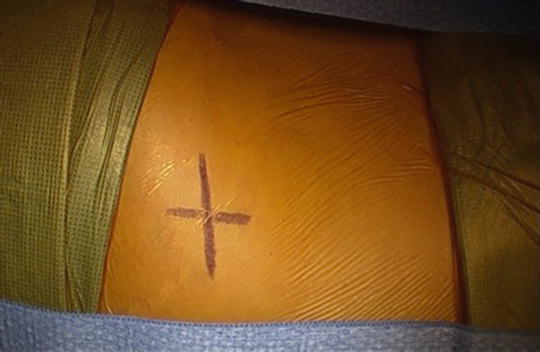

Fig. 33.12
Skin markings over the Ioban drape. Oblique line is for the skin incision. Vertical line is for reference so as to avoid swaying anteriorly or posteriorly with insertion of the instruments. The intersection of these two lines is the point that lies just anterior to the midpoint of the disc
Cut skin. Insert cerebellar retractor and lift up.
Bovie fat and subcutaneous tissue in line with incision (Fig. 33.13).
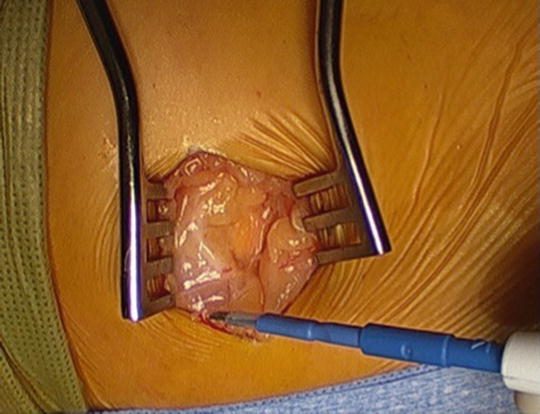

Fig. 33.13
Cerebellar retractors in place after skin incision. Use Bovie cauterization to control hemostasis
Always work directly down to the spine, the disc should be directly down from your incision if the disc position is perpendicular to the floor.
2.
Open fascia of external oblique muscle in line with muscle fibers with Metzenbaum scissors (Fig. 33.14). Split muscle with Metz or finger in line with fibers.
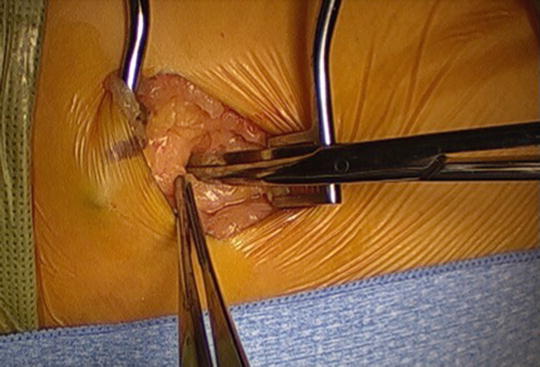

Fig. 33.14
Use Metzenbaum scissors to split fascia over the oblique muscles
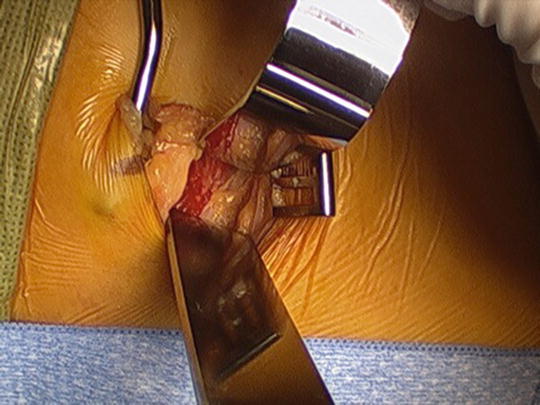
Split internal oblique muscle in line with fibers. Use two deep Sofield retractors (like army/navy but longer with blunt teeth) as you proceed deeper and remove cerebellar (Fig. 33.15).

