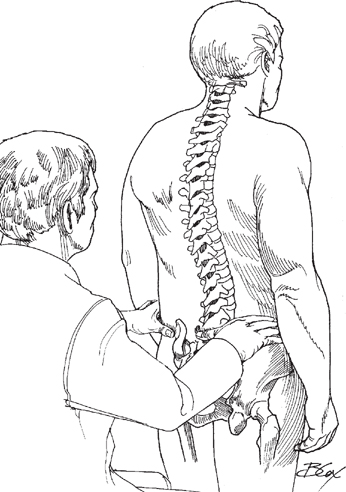
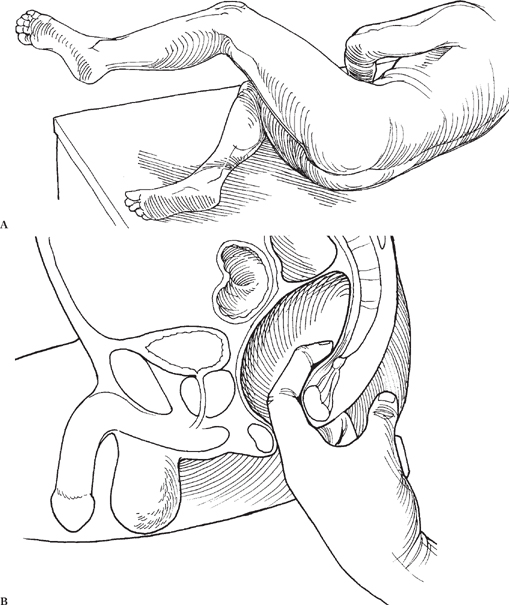
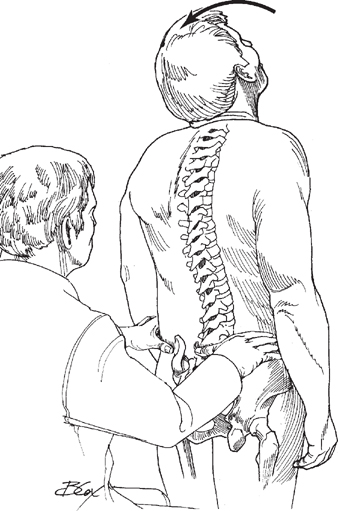
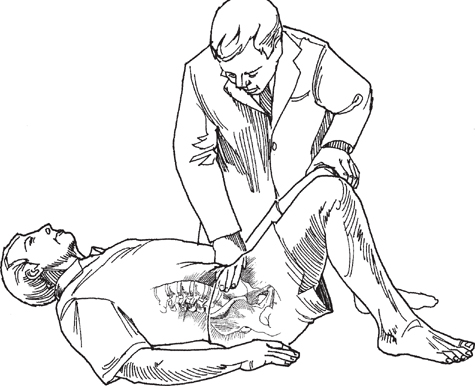
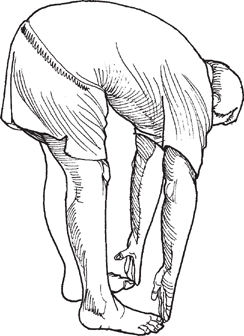
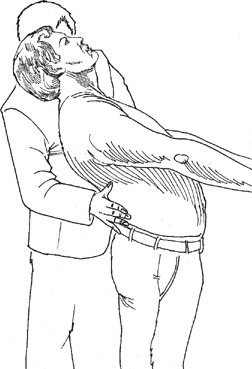
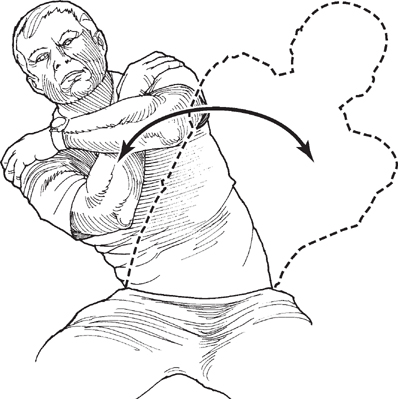
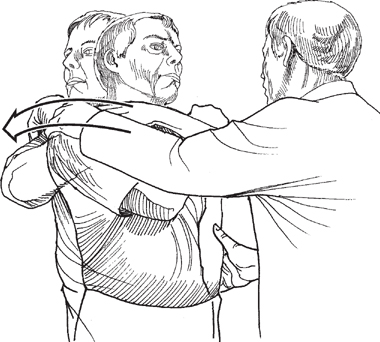
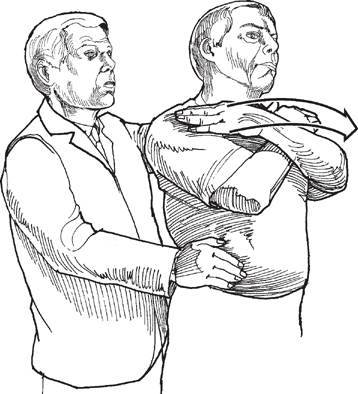
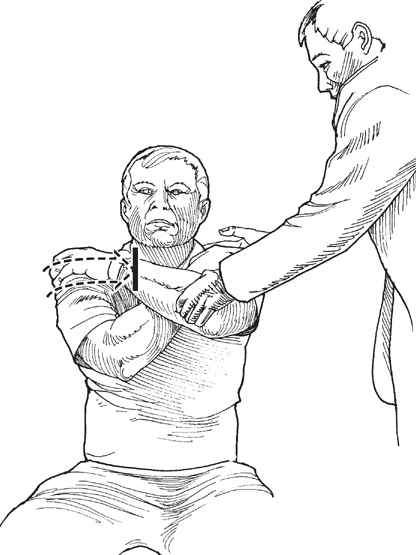
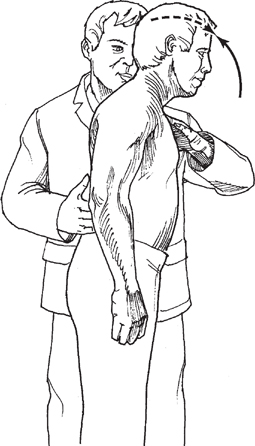
Chapter 4 CONTENTS V. NEUROLOGIC EVALUATION OF THE LUMBAR SPINE: L1-L3 VI. NEUROLOGIC EVALUATION OF THE LUMBAR SPINE: L4 VII. NEUROLOGIC EVALUATION OF THE LUMBAR SPINE: L5 VIII. NEUROLOGIC EVALUATION OF THE SACRAL SPINE: S1 IX. NEUROLOGIC LEVELS S2, S3, AND S4 X. CONCLUSION The nerve roots of the lumbar and sacral spine, like those of the cervical spine, innervate musculature in the extremities. Through testing of the sensory and motor function of the lower extremities, you will be able to localize a cord or root injury. When the patient enters the room, notice if he or she is distressed. Is the patient leaning to one side? Is the patient able to walk, and if so, is the gait normal? Pay attention to the pelvis, taking note of any tilt. Imaginary lines through both the anterosuperior and posterosuperior iliac spines should be in a horizontal plane with the floor. As in the cervical and thoracic examination, ask the patient to disrobe, and stay in the room to observe. Note if the patient is limited in any motion, and note the extent of any pain. Once the patient is undressed, look for signs of trauma, blisters, scars, discoloration, redness, contusions, lumps, bumps, fat pads, and other marks. Hairy patches or café au lait spots imply spinal dysraphism, and neurofibromatosis specifically. Next, instruct the patient to stand with normal posture. Look at the spine from the side, and assess the lumbar curvature with the normal lordosis. If possible, instruct the patient to bend over and flex the spine, and look for a lateral curvature, or scoliosis. If a lateral curvature is seen, ask the patient to sit, and reexamine the lumbar spine. Note if the lateral curvature persists. Posterior Lumbar, Sacral, and Coccygeal Spine To palpate the posterior lumbar, sacral, and coccygeal spine, sit on a stool behind the standing patient. Place your thumbs on the midline of the patient’s back at the level of the iliac crest. This should be the junction between L4 and L5, called the interspace (Fig. 4-1). From the interspace, palpate superiorly and inferiorly the spinous processes of the lumbar and sacral vertebrae. Absence of spinous processes may indicate spina bifida. Figure 4-1 Palpation of the lumbar spine. The coccyx is palpable through a rectal examination that is performed in combination with the examination for sphincter tone (Fig. 4-2) and sacral root defects, if necessary. This is done in a lateral decubitus position (Fig. 4-2A) to reduce discomfort to the patient and is usually performed at the end of the examination. Figure 4-2 (A) Palpation of the coccyx is performed most comfortably in the lateral decubitus position. (B) Coccygeal palpation through rectal examination can be performed in combination with the examination for sphincter tone and sacral root defects. Instruct the patient to stand and extend the neck. Palpate the paraspinal muscles on each side of the midline simultaneously (Fig. 4-3). Deep massage and kneading are used to detect tenderness, spasm, muscular defect, and asymmetries. Anterior Lumbar, Sacral, and Coccygeal Spine To perform palpation of the anterior lower spine, instruct the patient to lie supine on the exam table with knees bent and muscles completely relaxed (Fig. 4-4). Figure 4-3 Palpation of the paraspinal muscles and the posterosuperior iliac spine. Figure 4-4 Palpation of the anterior lumbar spine can be performed with the patient supine, knees bent, and abdominal muscles completely relaxed. Active Movements Forward Bending To test forward bending, ask the patient to bend over and touch the toes without bending the knees (Fig. 4-5). Take note of fluidity and any areas of restricted movement. Backward Bending To examine lumbar extension, place a hand on the patient’s lower back over the posterior superior iliac spine. Instruct the patient to fully extend the spine by bending backward (Fig. 4-6). Take note of the fluidity and range of lumbar extension. Figure 4-5 Forward bending. Figure 4-6 Lumbar extension. To test active side bending, instruct the patient to cross the arms and rest the hands on the opposite shoulders. Ask the patient to side bend to the left and then to the right (Fig. 4-7). The crossing point of the arms makes an imaginary axis of rotation. Place a hand on the iliac crest of the patient for stabilization. Note any pain and limitations in movement. Trunk Rotation Lumbar trunk rotation occurs with the patient standing, arms crossed and hands resting on opposite shoulders. Make sure that the patient keeps the chin directed perpendicular to the shoulders so that the cervical spine is not rotated. Figure 4-7 Lumbar side bending. Place a hand on the iliac crest of the side the patient is going to rotate away from. Place the other hand on the patient’s opposite shoulder. The patient should rotate in each direction separately (Fig. 4-8). Passive Movements Passive tests are employed when full range of motion is not achieved during active testing. Passive tests of flexion are not performed because of possible aggravation if a disk protrusion exists. When testing passive movements, take note of the end feel, range of motion, and any pain elicited. Figure 4-8 Trunk rotation. To perform passive rotation, instruct the patient to stand. The patient’s arms are crossed, and the hands are rested on the opposite shoulders. Once the patient is in position, stand behind the patient and place one hand on the iliac crest and the other hand on the patient’s shoulder. Finally, rotate the patient in the tested direction (Fig. 4-9). Figure 4-9 Passive rotation. Rotation To perform resisted rotation, instruct the patient to sit with arms crossed and hands resting on opposite shoulders (Fig. 4-10). Stand in front of the patient. To test rotation to the left, place your left hand on the patient’s left arm and your right hand on the back of the patient’s left shoulder. Then ask the patient to rotate to the left against the resisting force. Figure 4-10 Resisted rotation. To perform resisted flexion, stand to the side of the patient. Place one hand on the patient’s back over the posterosuperior iliac spine and the other hand on the chest over the manubrium (Fig. 4-11). Instruct the patient to flex as you resist. Note any weakness or pain. Side Bending To test resisted side bending, sit next to the seated patient. Wrap one arm around the patient’s back and place your other hand on the patient’s shoulder (Fig. 4-12). Sit close to the patient, and place the lateral side of your pelvis against the patient’s pelvis to lock it into place. Instruct the patient to side bend away from you, and resist the motion. Note any weakness or pain.
PHYSICAL EXAMINATION OF THE LUMBOSACRAL SPINE
Chapter 4
PHYSICAL EXAMINATION OF THE LUMBOSACRAL SPINE
INSPECTION
PALPATION
MOVEMENTS
Related posts:


Stay updated, free articles. Join our Telegram channel

Full access? Get Clinical Tree


